Smart bulbs and lights are a dream for hackers. There are light switches available for smart bulbs but why buy if you can DIY. My light switch should have two buttons. One to turn on and to make the lights brighter and one to turn off or darken the lights. If both buttons are pressed the lights should change colors. The new color should be a color from a predefined set of colors. Here, one way to go: You need
- Smart lights (of course)
- computer with GPIO (e.g. Raspberry Pi)
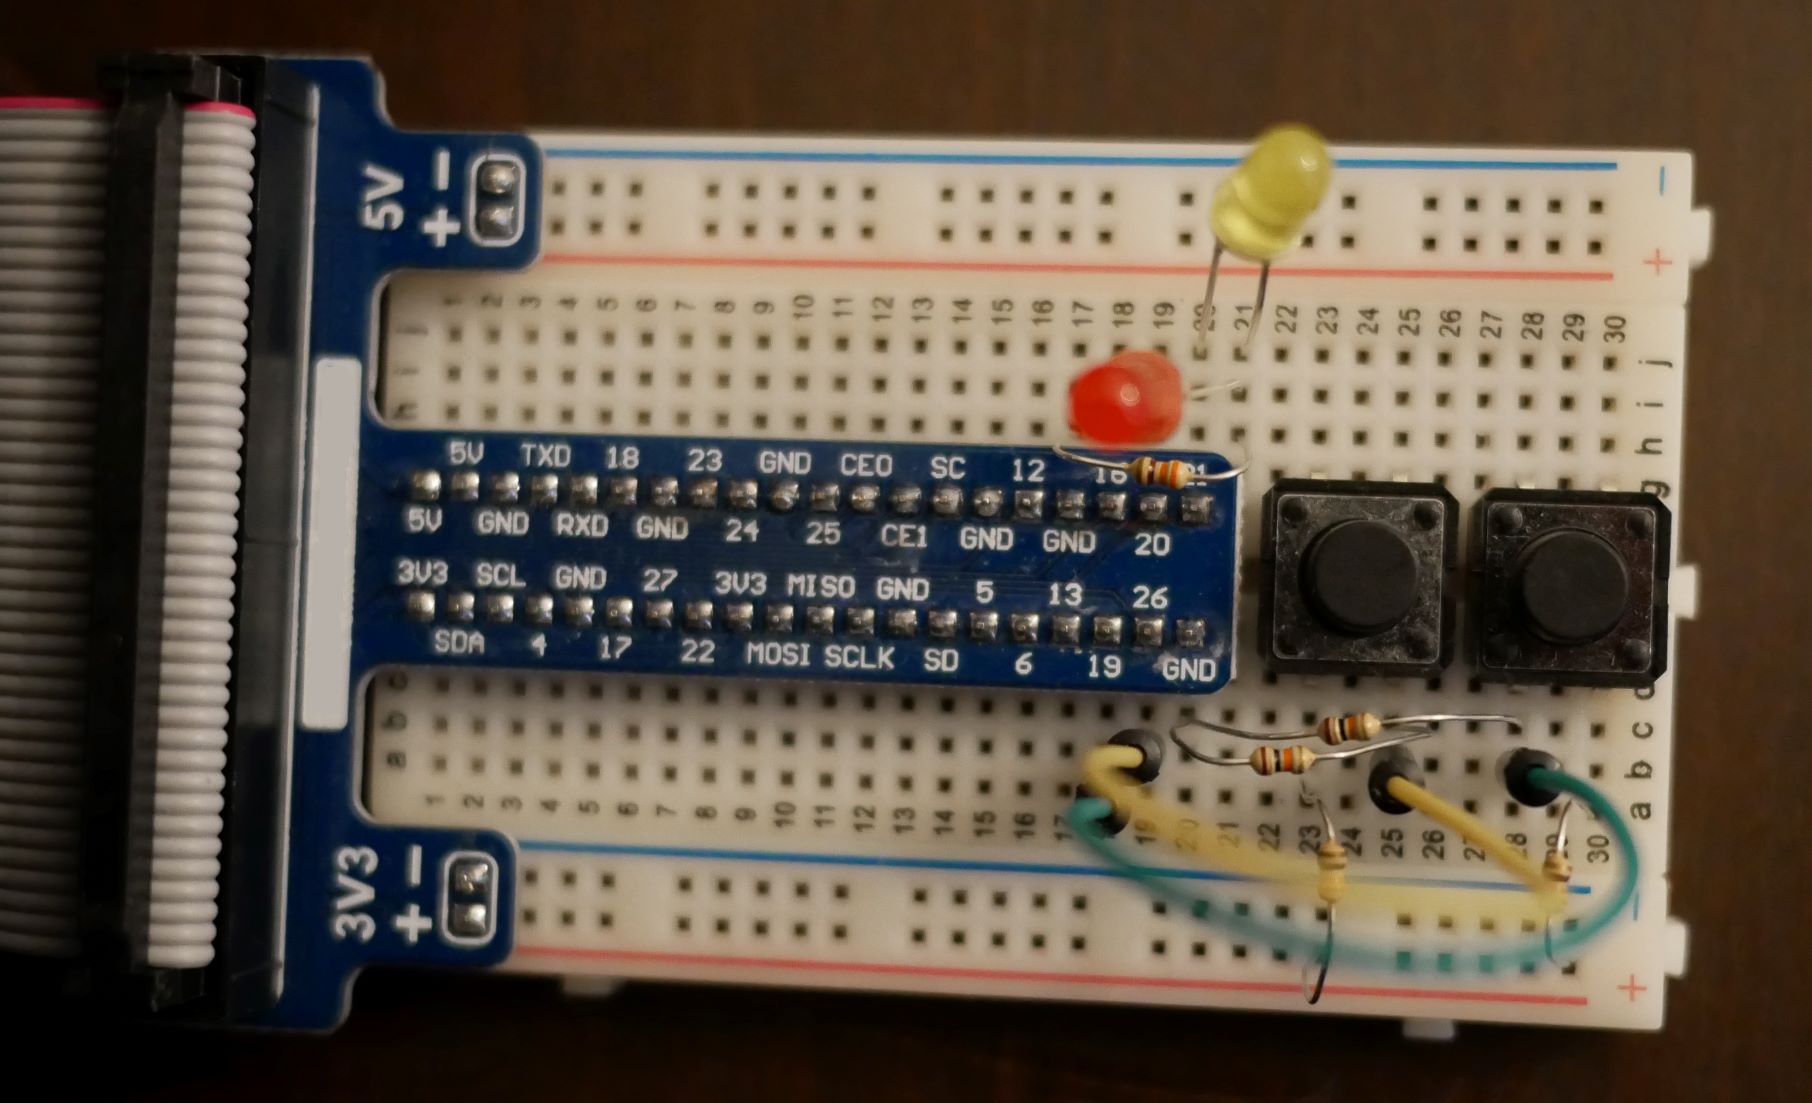
- Two buttons, two LEDs, resistances, cables, optionally a board
Wire the one button to GPIO 35 and one to 37 and one LED to 38 and one to 40.

The following python script does the job for the Philips Hue system
1
2
3
4
5
6
7
8
9
10
11
12
13
14
15
16
17
18
19
20
21
22
23
24
25
26
27
28
29
30
31
32
33
34
35
36
37
38
39
40
41
42
43
44
45
46
47
48
49
50
51
52
53
54
55
56
57
58
59
60
61
62
63
64
65
#!/usr/bin/python3

# Import the required module.
import RPi.GPIO as GPIO, time
import requests
import json
import time

# Set the mode of numbering the pins.
GPIO.setmode(GPIO.BOARD)
# GPIO 38 and 40 is the output.
GPIO.setup(38, GPIO.OUT)
GPIO.setup(40, GPIO.OUT)
# GPIO 35 and 37 is the input.
GPIO.setup(35, GPIO.IN)
GPIO.setup(37, GPIO.IN)
# Initialise GPIO21 to high (true) so that the LED is off.
GPIO.output(40, False)
GPIO.output(38, False)

# Base URL
url = "http://[IP]/api/[TOKEN]/groups/[GROUP ID]"
hue_index = 4

def change_brightnes(change):
    r = requests.get(url)
    brightnes = min(int(r.json()["action"]["bri"] + change), 254)
    if brightnes > 0:
        requests.put(url+"/action", data = json.dumps({"bri": brightnes, "on": True, "transitiontime": 5}))
    else:
        requests.put(url+"/action", data = json.dumps({"bri": 1, "on": False, "transitiontime": 50}))

def change_hue():
    global hue_index
    hues = [0, 5461, 10922, 16384, 21845, 25500, 27306, 32767, 38229, 43690, 46920, 49151, 54612, 60074]
    requests.put(url+"/action", data = json.dumps({"hue": hues[hue_index], "sat": 254}))
    hue_index = (hue_index + 1) % len(hues)


def button_press(channel):
    global start
    global double
    led = channel + 3
    if GPIO.input(channel) == 1:
        GPIO.output(led, True)
        double = True if GPIO.input(35) == GPIO.input(37) else False
        start = time.time()
    if GPIO.input(channel) == 0:
        elapsed = time.time() - start
        GPIO.output(led, False)
        if double == True and GPIO.input(35) + GPIO.input(37) == 1:
            change_hue()
        elif double == False:
            sign = 1 if channel == 37 else -1
            change = sign * elapsed * 50
            change_brightnes(change)

GPIO.add_event_detect(35, GPIO.BOTH, callback=button_press)
GPIO.add_event_detect(37, GPIO.BOTH, callback=button_press)

try:
    while 1:
        time.sleep(1)
finally:
        GPIO.cleanup()
The GPIO pins are set up (lines 9-19) and set up the base URL with the IP address to the Hue bridge and the authentication token as well as the ID of the light group that should be controlled (line 22). You can find out on the Hue developer page how to get a token. A function is defined to change the brightness (line 25). The current brightness is requested (line 26) and the new brightness is set as current plus change but not more than the maximum of 254 (line 27). If the new brightness is greater than 0 the brightness is changed (line 29) otherwise the lights are turned of with a transition time of 5 s (line 31). A function to change colors is defined (line 33) with a set of colors (line 35). The color is set (line 36) and the an index is set that loops through all colors in the set (line 37). And a function for checking the button events is defined (line 40). We assign an LED to the events pin (line 43). If the button event was a press event (line 44) the controll LED is turned on (line 45), we check if both buttons are pressed (line 46), and start the timer (line 47). If the button event was a release event (line 48) the elapsed time since button press is calculated (line 49), the control LED is turned off (line 50), and we check if the other button is pressed (line 51). If so the color is changed (line 52) if not we check if the other button have been pressed while this one was pressed (line 53). Only if it hadn’t a sign is assigned to mark a increase or decrease of brightness (line 54), the change of brightness is calculated depending on how long the button was pressed (line 55), and the brightness is changed (line 56). For each button an event is set for press and release and the just defined function is set as callback (line 58 and 59). A while loop prevents our program to finish by it self (line 62) and we clean up in case of interruption (line 65).
